Overview
This is a project that – more than any of my previous projects – served to satiate my duality of beliefs over having stuff that is cool and having a lot of clutter in my house. And when I say cool, I mean ‘I can’t believe my boyhood dreams of owning my own arcade have come true’ combine with ‘I don’t need that much stuff in my house and 1980s video game consoles are not exactly low maintenance’. So enter the world of: compact PCs and classic game emulators.
The hardcore among you may remember dropping quarters in the arcade and spending a large portion of your youth fighting with ninja turtles, shooting vampires, or just gobbling up the lines of white dots and arrant fruits. While I still have dreams of owning/building a full upright arcade, this was an opportunity to take the guesswork out of many sub-portions of the job as its own mini-project.
Overall, this project took just under a two months from idea to completion, plus another two months of trial testing with some revisions. This also served as the second project that I think designed and considered with future scaling as a product in mind.
Purpose

The purpose of this project was to expand my skills in 3D modeling, modification of existing real-world objects, electrical wiring, multi-material prop making, and multi-functional assembly design as a user-facing product. Coincidentally, it also made a good prototype for a real world arcade machine and virtual pinball machine that I hope to build in the not-too-distant future.
Process
Research and Inspiration
Before even beginning to embark on this journey, I had to first do a deep dive into the controversial world of -(pause for dramatic effect) – fight sticks and arcade button layouts.
This project originally started by seeing if I could buy something off the shelf to satisfy my layout questions, and it turned out that there were many confident and differing answers on the internet. Many plans had rectangular layout (essentially a 2×3 or 2×4 rectangular grid), some an inclined slope, and others swore by something in between. Some had dimensions, others were (built by user/builders preference). I’m a big guy with big hands, but I also wanted this to feel as standard as possible for my much daintier wife and any guests in between. After much research, I was finally pointed towards SlagCoin’s Button Layout Guide which had an excellent chronology and technical detail of the layout needed. After much review, I finally settled on the Japanese Style with Additional Spacing as a nice comfortable-looking pattern that still allowed for some wiring clearance. I also settled on a gentle slope of the controllers to help with ergonomics.
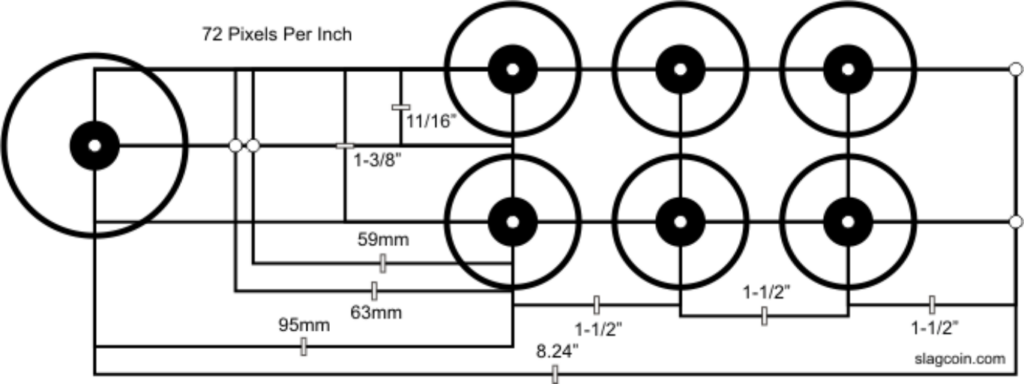
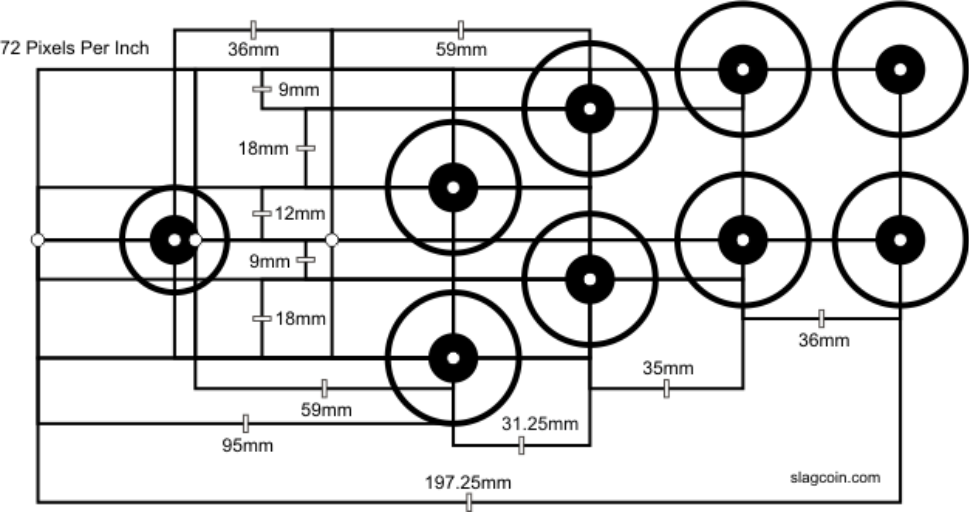
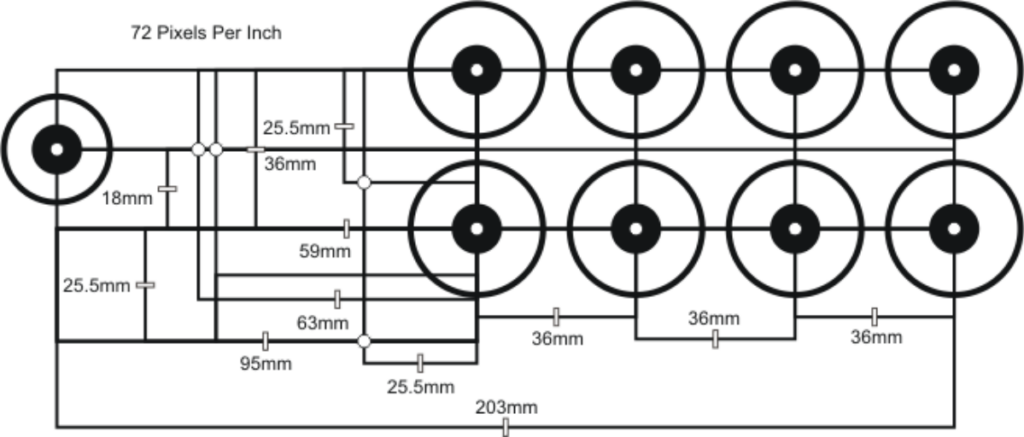
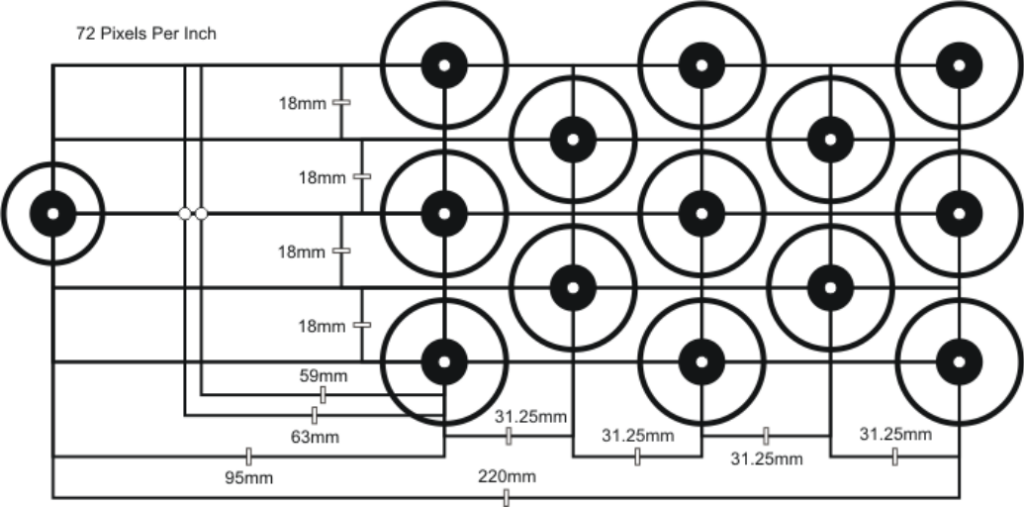
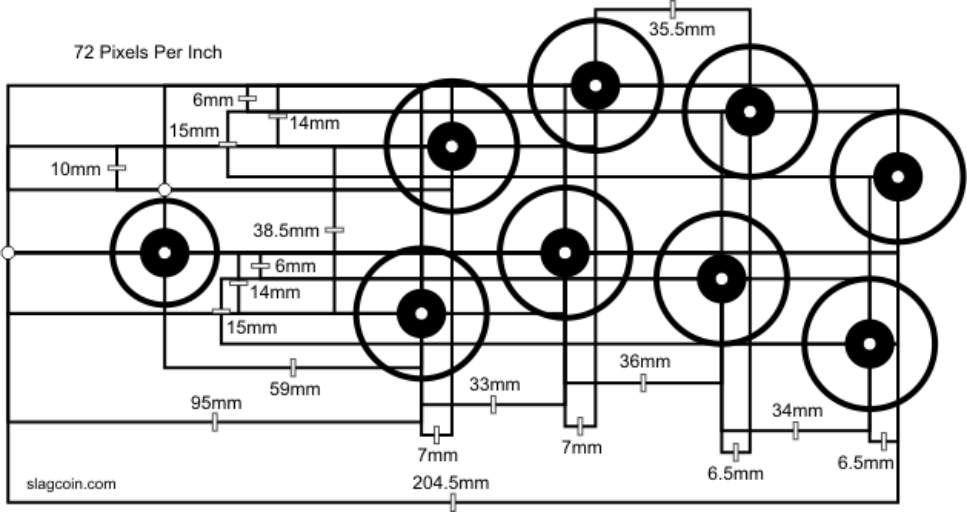
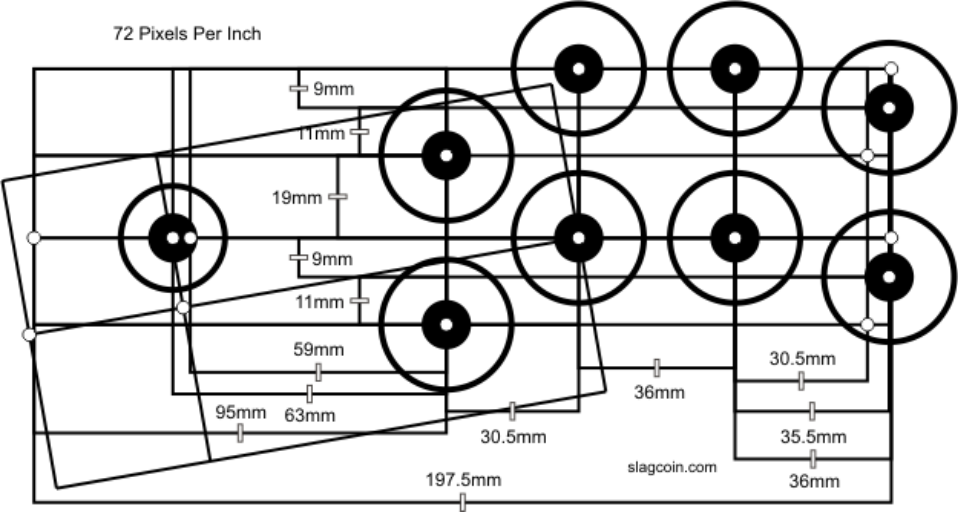
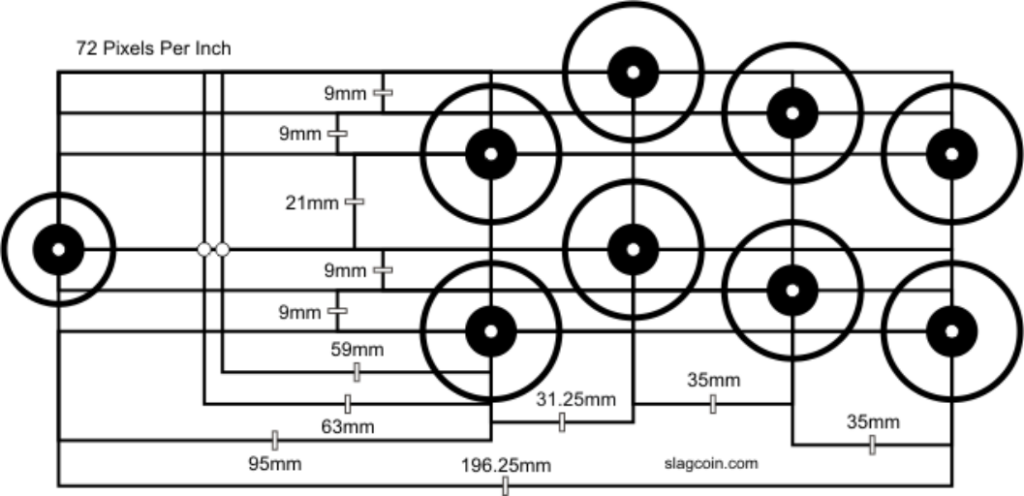
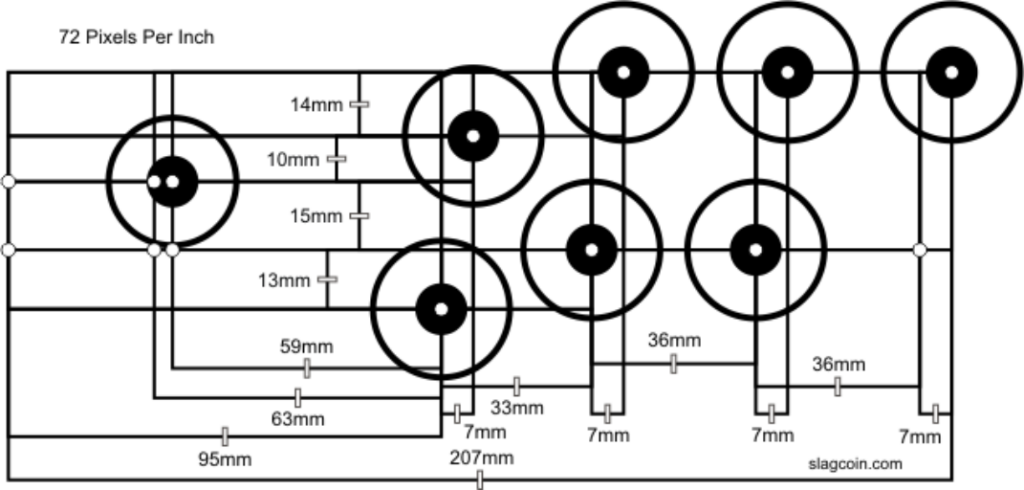
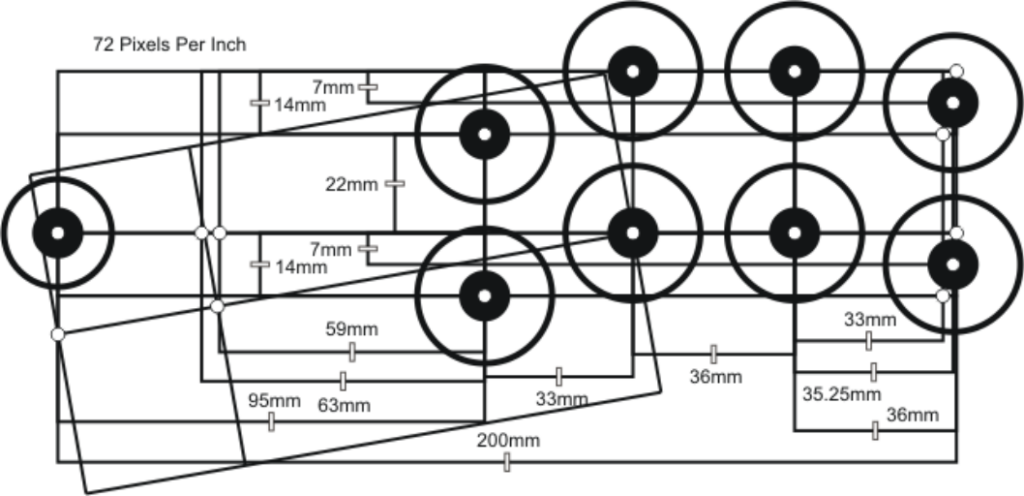
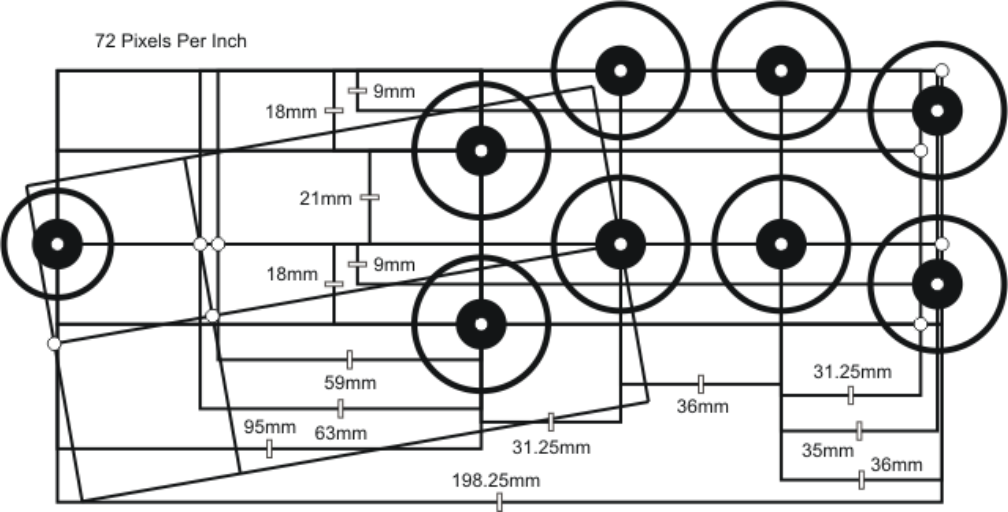
For electronics, some hobbyist and professional solutions were readily available. After researching a few options, I ended up going with a red & blue kit from GeekPub. Having a kit off-the-shelf allowed me to save time troubleshooting by having a solution that was tried and true, leverage multiple colorways to see what I wanted in a later version, and had the benefit of backlighting if desired. These came with a large selection of button labels that could be located underneath the translucent button caps, ensuring that they will always be visible and never peel up during gameplay. It’s worth noting that you still need a computer and screen to play your games on. Anything USB will work with this kit, so I opted for a Raspberry Pi 4 that I had laying around and installed the RetroPie software onto it.
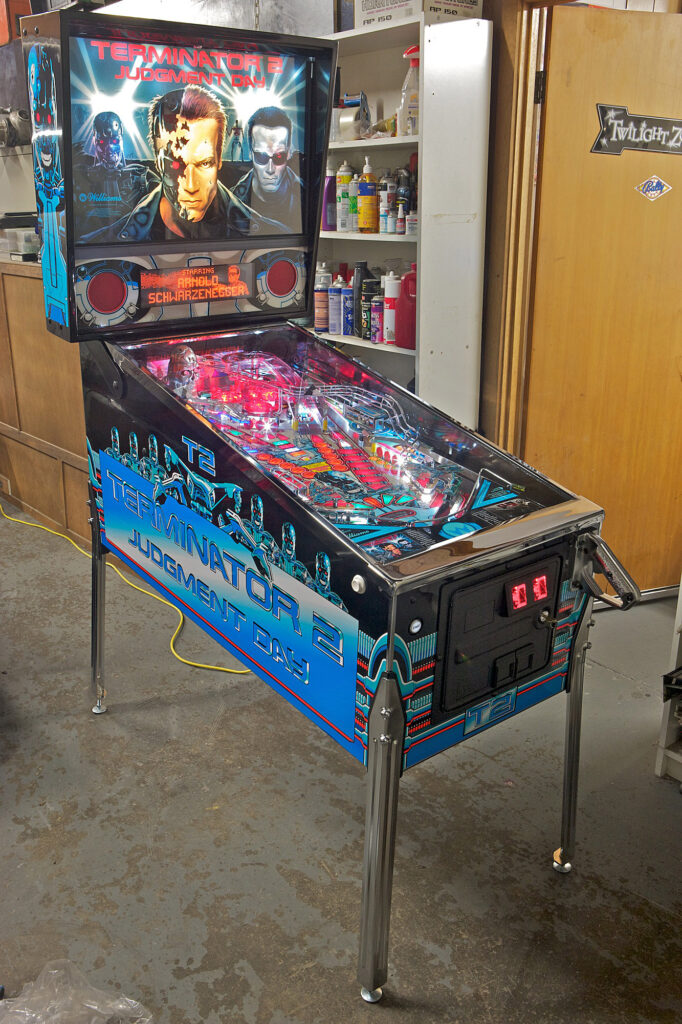
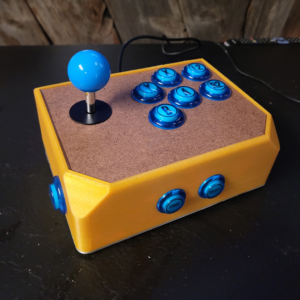
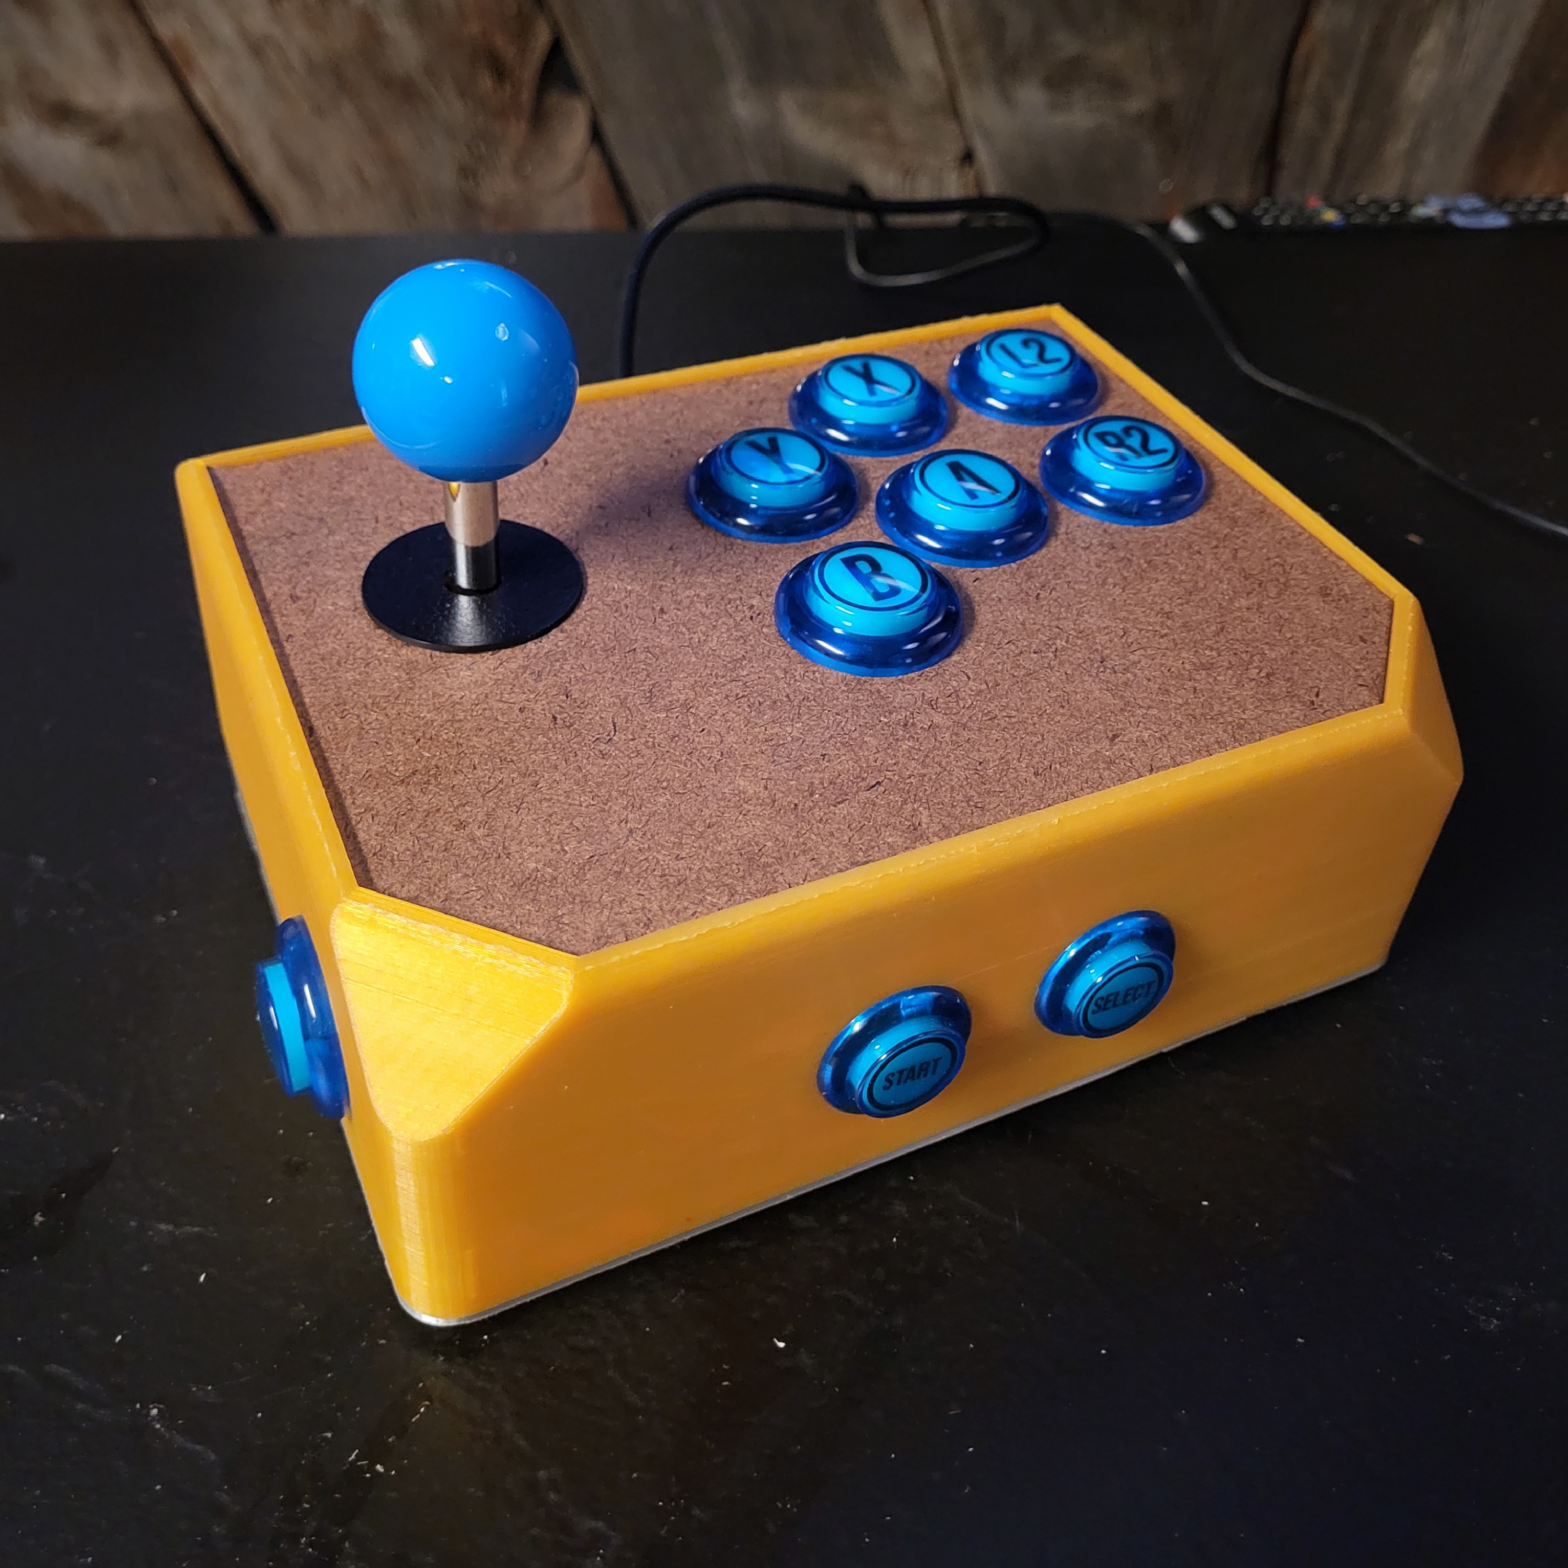
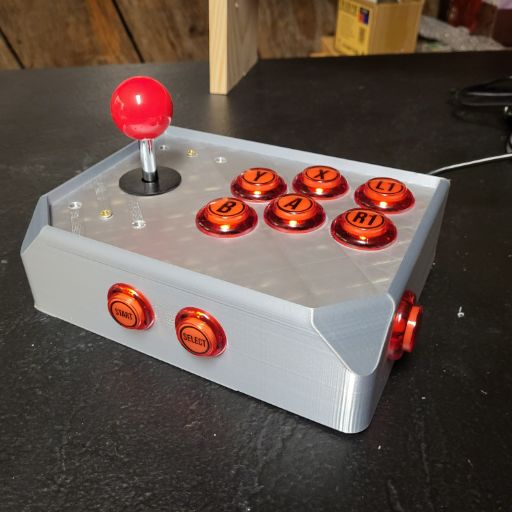
Finally, I knew that the majority of the games I was interested in were retro arcade fighting games, and as such I would not need more that a 2×3 layout. Rather than leave them in case of future need, I know that I also wanted some side buttons to pursue virtual pinball machines, and chose instead to repurpose the additional buttons from the set to add to the sides of the controller to emulate those bumper action buttons. Like both arcades and pinball I wanted tow buttons on the front of the controller to emulate the start and select [aka coin insert] usually on the front of those machines.
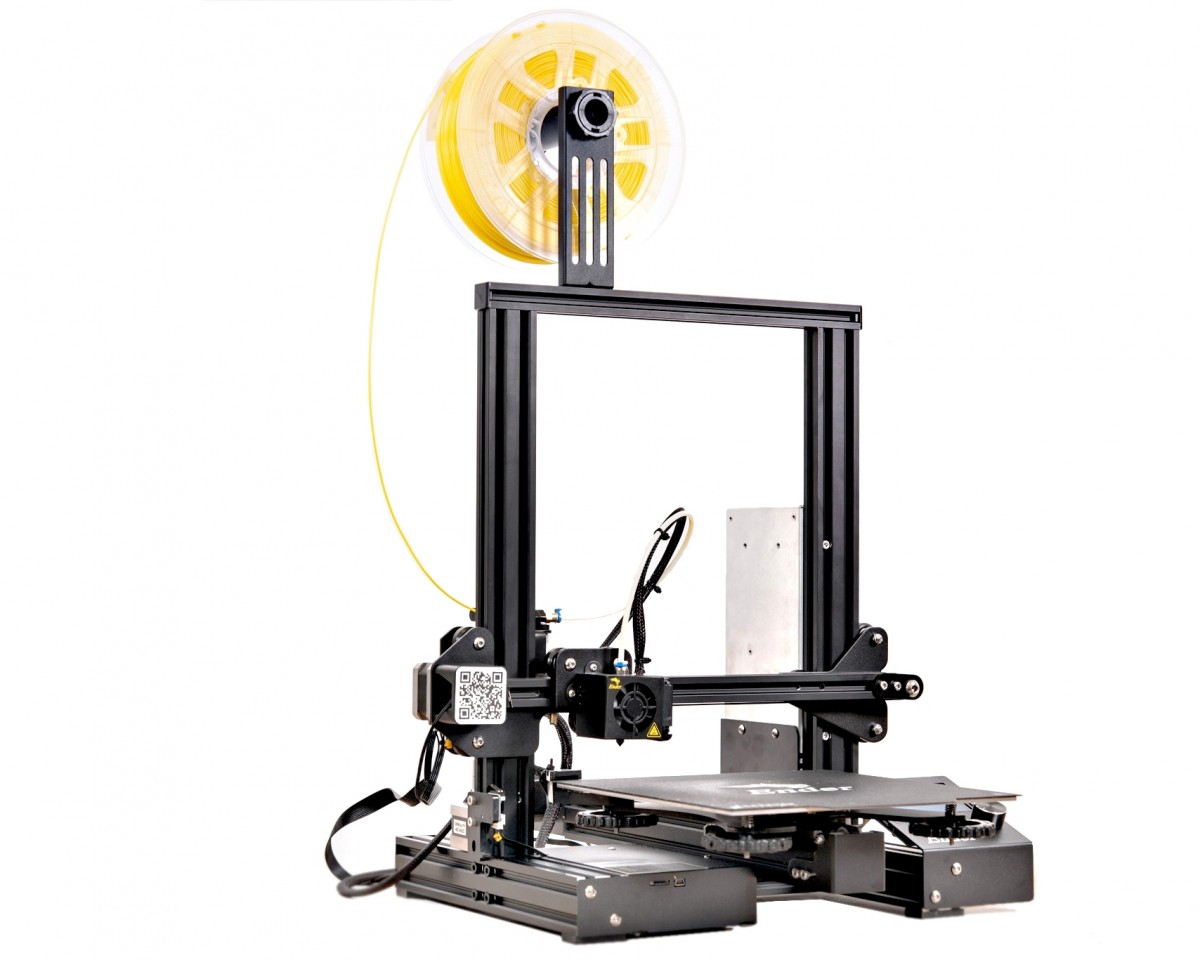
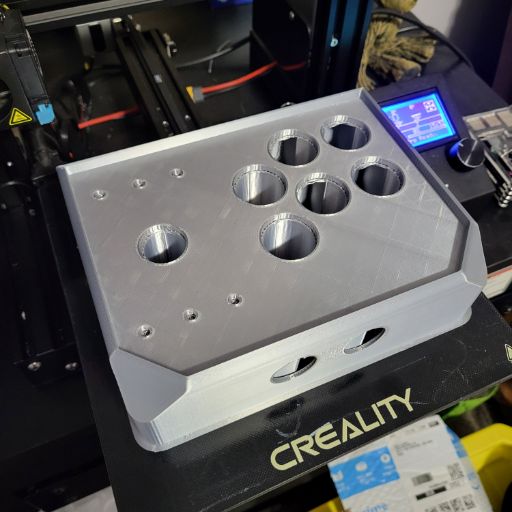
As a final test of my own hubris, I decided to print the entire controller shell in two parts, one of which being a sliding base plate and the other being the rest of the controller – essentially all five other sides holding all of the electrical components. And I wanted to be printable on the most accessible printer around – the Creality Ender 3 stock build plate. And with that in mind, we were off to the races.
Tools List
- 3D Printer [Creality Ender 3 or larger]
- Hatchbox PLA
- Brew Pub 2 Pack Controller Kit
- 90760A170 Steel Hex Nuts [or equivalent, QTY 8]
- 92210A148 Flat Head Screw [or equivalent, QTY 8]
- [Optional]
- ~24 x 24 in MDF
- ~4 oz Resin
- 2x20mm Magnets [QTY 4]
- Threaded rubber feet [QTY 4]
Design Sequence
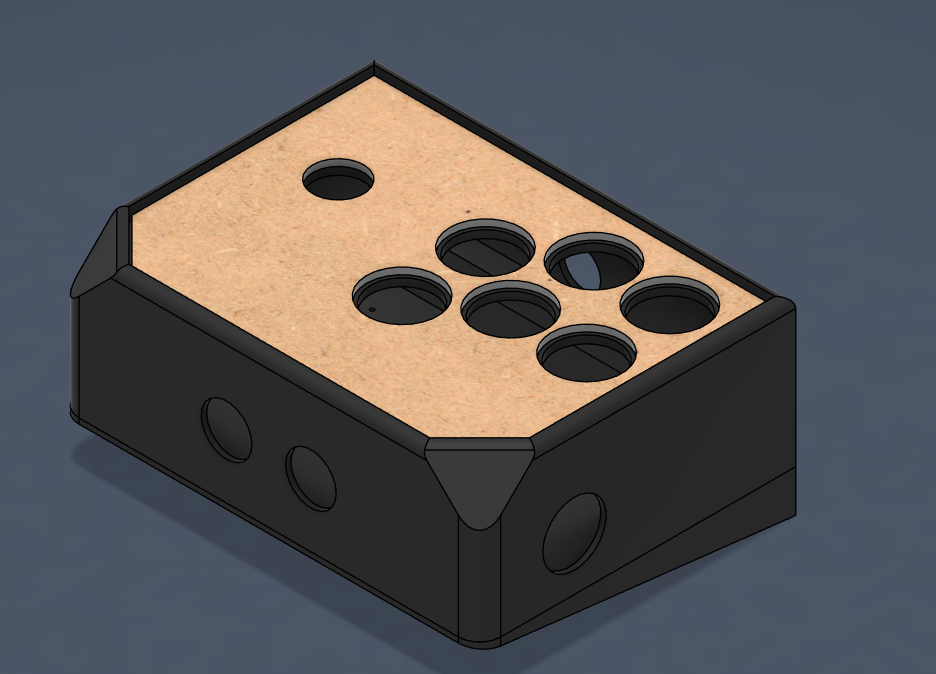
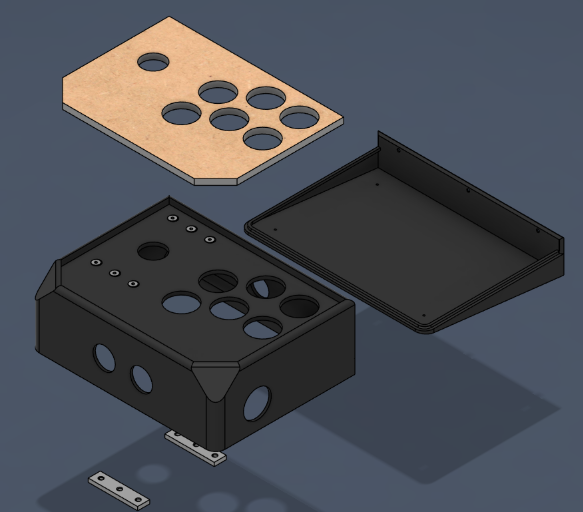
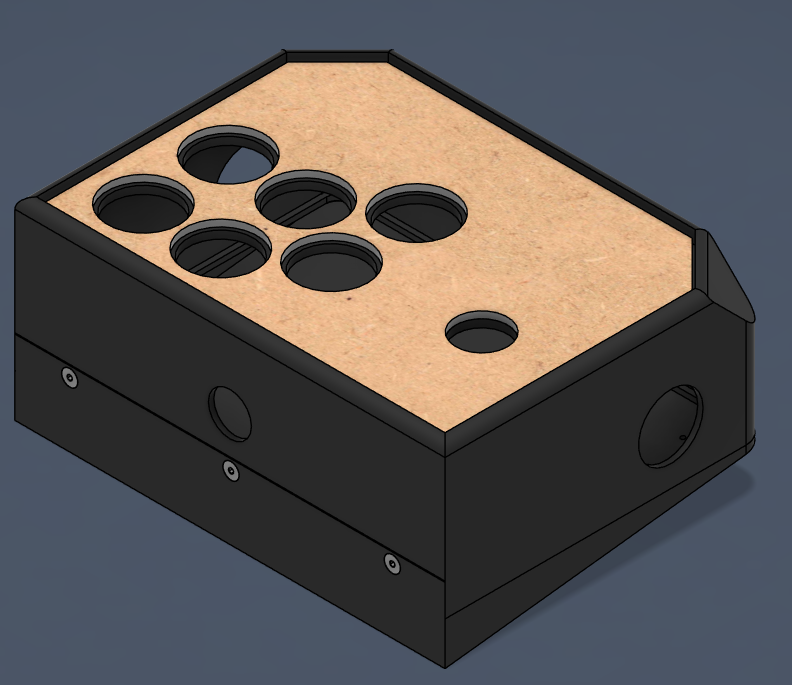
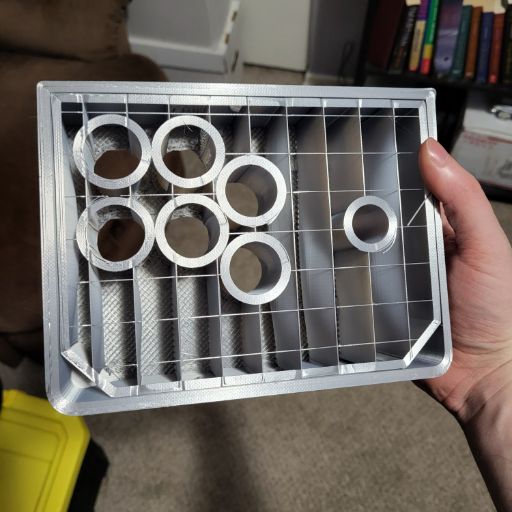
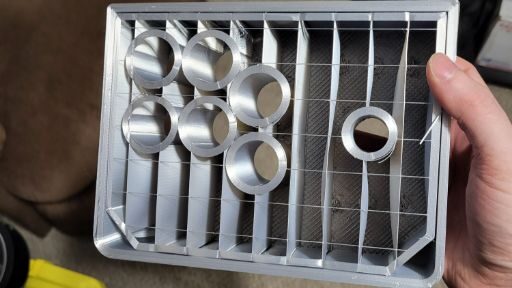
This prop was designed in Fusion 360, with 4 [optionally 5] printed parts in total. Two being the aforementioned shell, and the other two being the small floating supports to hold the joystick seamlessly to the top of the controller shell. I opted for an aesthetic where all the fasteners are invisible to the player, the only exception of which being to remove the base from the rest of the enclosure for any maintenance. To achieve this, I planned to cover all the joystick fasteners with a cut sheet of MDF to get the tactile feel of an arcade machine, though I also ended up trying out resin pouring as well which had a similar nostalgic feel. You could also just print the top plate if you wanted, every tool being a hammer and whatnot.
The prints came out great on the first try (well actually second, through just user error) and the MDF came out great as well. All it took was patience, screwing up, phoning a friend with a laser cutter, screwing tat up as well, and then finally post-processing to get it to fit right. And then modifying the design files to need none of that re-work for the second one.
Post-Processing and Assembly
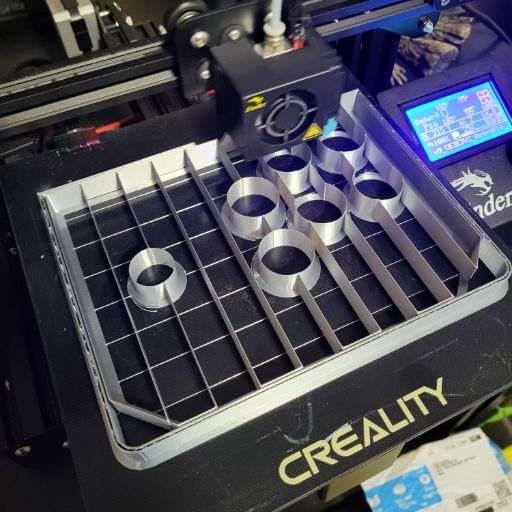
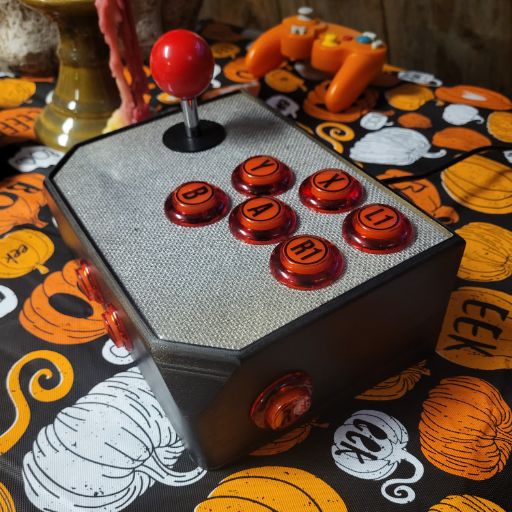
This project went together surprisingly well, and it was only the mundane issues that seemed to surprise me. An example of this was that I originally did not model nut housings on the base plate, thinking I could simply glue them in place. They of course snapped the glue immediately on any sort of torque and I spent time trying to convince it not to free-spin in the enclosure. You can see the results of me assembling a dry fit with the buttons in grey and no cover, which certainly looks fine on its own for the particularly impatient.
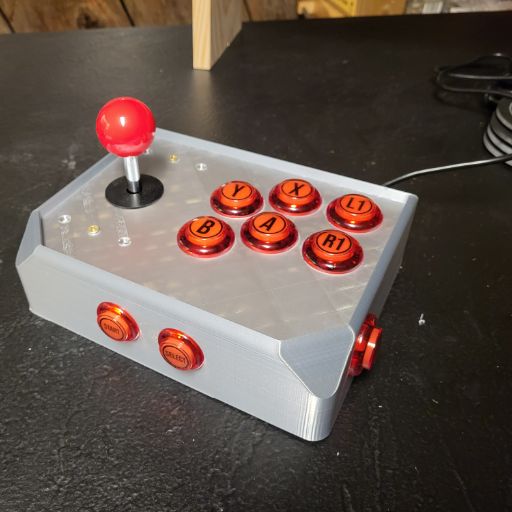
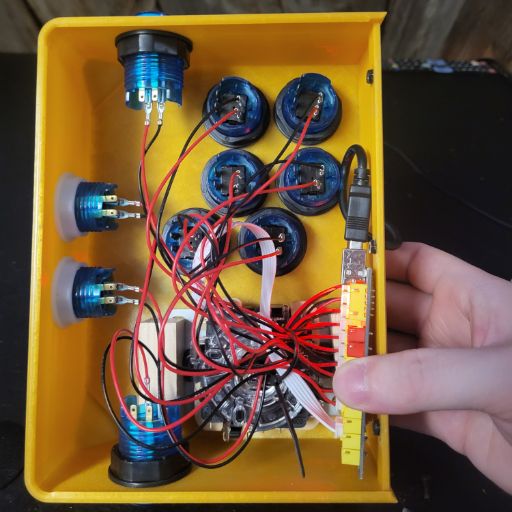
One of the features I was more proud to model was the sliding lip interface between the base plate and the top enclosure. This is the secret sauce that allows it to hold the base onward, keep the controller box square, and allow all the fasteners to be on the back and simply retain the base plate. This helped to keep the rest of the area very accessible for electronics wiring, which went together as expected thanks to the instructions provided by GeekPub. This wasn’t quite a struggle to fit, but I’m glad I didn’t have to go any smaller. Especially with the retaining rings for the buttons so close together.
Overall I’m very satisfied with this result. This looks perfectly at home on my basement bar next to the television, and tucks away easily when not in use. It’s been a hit with friends who have come by and I look forward to iterating on it in the future.
Lessons Learned and Future Plans
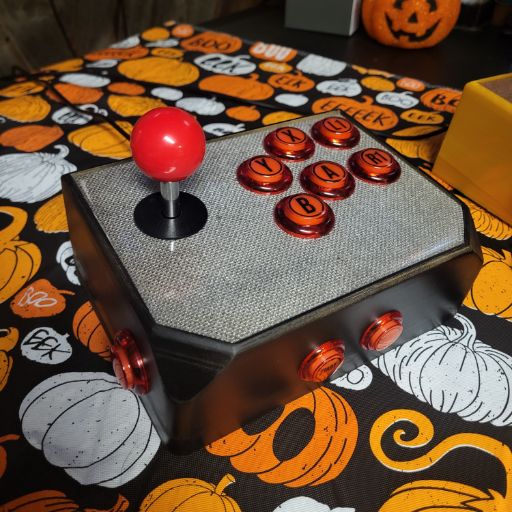
- Accidentally laser cutting my first MDF upside down actually became one of my favorite aesthetic alternatives. By painting the ‘rough side’ in a spare rattle-can of metallic silver, and then covering the whole thing in resin, it gave a very grungy look and yet a very smooth and 80s lacquer feel. The discoloration on the photos is likely due to the camera trying to adjust to that table mat, as it looks very consistent in person.
- Playing with the color choices of the arcade buttons was great, but ultimately I probably won’t go with either of them if I were to build my own. The plastic works fine but doesn’t have the high-quality feel or weight that I would want from an upright arcade machine. It works great as a small controller though, and if anything works best for this small scale controller.
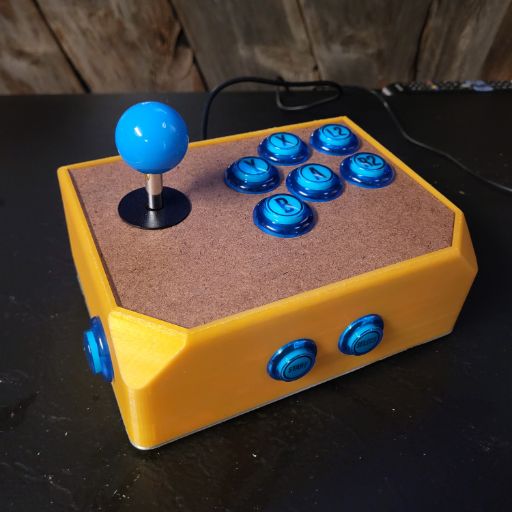
- I made a revision to allow the cover to be removable and a non-printed material is exactly what this controller needs. If it were something like wood or MDF to be cut by hand, the ridges of the buttons any joystick cover plate were designed to hide exactly these imperfections. Making this a removable piece also allows infinite personalization, which I think is perfect for gift-giving while still feeling like an off-the-shelf product.
I am considering a future commercial version of this project, but will need a few things lined up first.
- If I continue to print low volumes of this, I would likely offer a variety of filaments with reliable printing properties (to remove/mitigate any base painting step) and experiment with PETG or ABS rather than PLA for durability.
- Separating the covers from the print means that the personalization could also be an upgrade for a later date, or a customer could continue to order different plates as desired. Since they sit flat, they could easily be stored away when not in use or used as a display of their own.
For more posts like this, check out some of our other recent work as well!
